2021.11.15
After doing the hinge door modification last week, this week's boat project was to install a battery monitor so we have a clear idea of how much power we are using (and more importantly: how much we have remaining).
It didnt take much research to discover that the Victron BMV-712 was the monitor of choice for many boat (and RV) owners. It has Bluetooth capability built-in and a companion app so you can see your battery status right on your phone. In order to complete the project, I also purchased a bus bar and two custom-made battery cables.
Before doing any electrical work on your boat, you should ensure that the battery switches are off and that your solar panel is covered (I used a blanket) so that no current is flowing in.
There are a few steps to this install. The first is to run the communication wire (looks like a standard telephone cord) from the cave (or whereever you plan to install the monitor) to the battery compartment (in the port side lazarette on my boat). You have to remove the 24/7 fuse panel cover and then unscrew the carpeted cover that runs under all of the electrical components. From there I was able to snake the wire from inside out into the port lazarette.
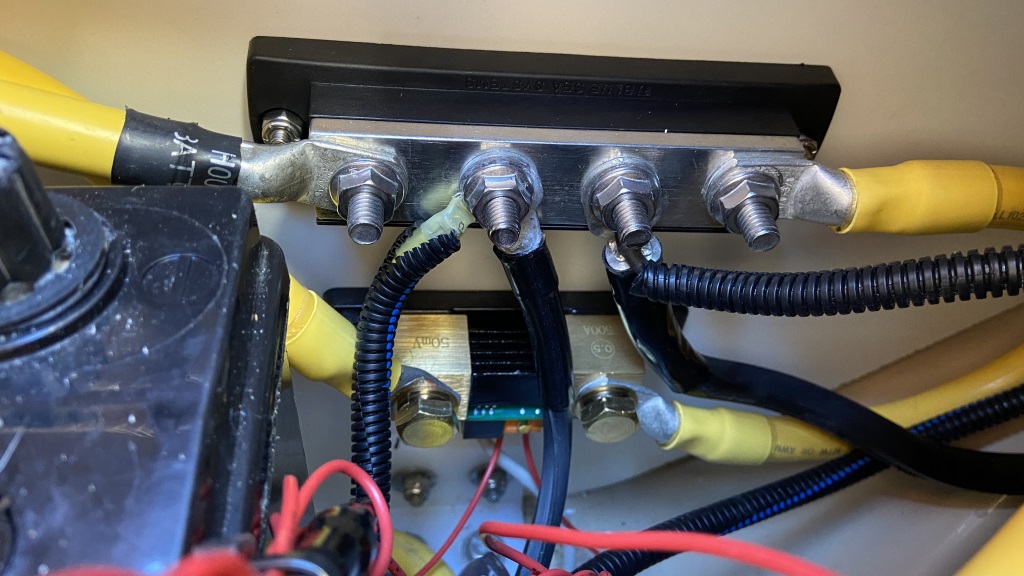
Next step was to install the shunt. The shunt is the thing that actually measure the current flowing through the system. One side connects to the negative terminal of the house bank, and the other side connects to 'all loads and chargers'. That means everything else goes on the other side. If your boat is like mine, it likely came from the factory with a few things wired directly to the negative terminals - those all need to move to the 'load' side of the shunt. And your boat might also have the starter battery negative daisy-chained to the house battery negative - if that is the case, then you need to move the starter negative to the load side as well. The only thing on the 'battery' side of the shunt should be the house negative. An easy way to think about it is:
In order to move all of the other connections to the 'load' side, I installed the bus bar. That gave me additional posts to move all of the negative connections to. The final wiring looks like this:
H1<-->H2<-->SHUNT<-->BUS BAR & everything else
Then it is just a matter running the small leads to the positive terminal (this monitor also lets you monitor the voltage of a second battery so I wired that to my starter battery) and connecting the communication wire.
Back at the other end, I drilled a hole in the wood panel using a 2 1/8" hole saw and installed the monitor. Be careful to make sure you have space behind the panel and that you dont damage any wires when drilling through.
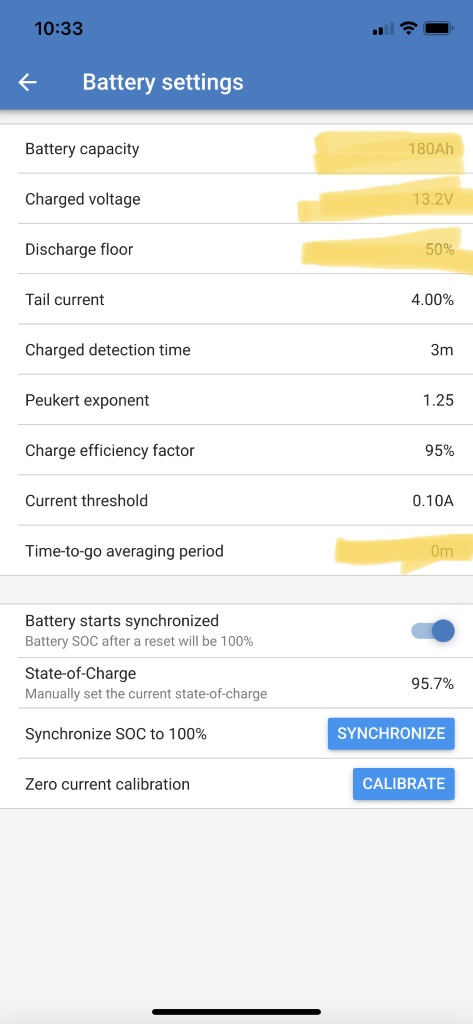
The system automatically comes to life, but you do need to configure a few things that are specific to your boat. You can do it via the monitor itself, but it is easier to download the VictronConnect app and do it from your phone. The important things to set are:
Once you do that, you can see all of the perinent information in the app, including a super convenient feature to tell you your 'time to go' value - essentially how long you can continue to run at the current amp draw until your batteries will need recharging. When you are using electricity, the Current and Power values will show negative. But if you have a solar panel (or when charging your batteries from shore power), it will show positive values (net energy going into the battery). Now we just need to get out on the water and try it all out.

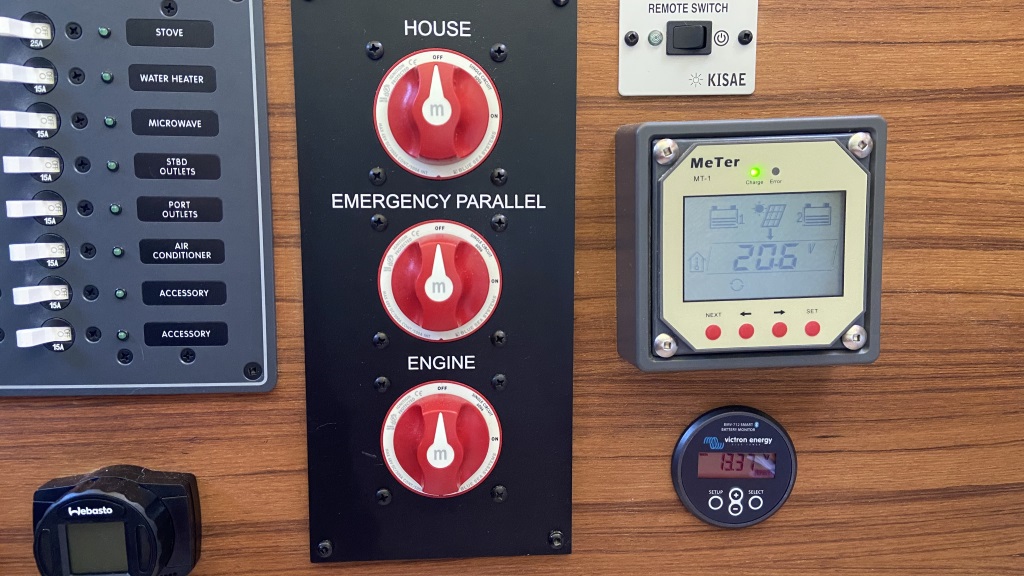
TIP: After I got this all set up, I noticed some weird behavior. The house battery voltage and the starter battery voltage always gave the same reading. And when I put load on the starter battery (like tilting the engine up/down), it showed the current draw from the house bank! I quadruple checked my wiring to ensure that everything was correct and that batteries were not daisy-chained together. I posted a question on the Tugnuts forum and got a great response from Martin (Submariner) who explained what was going on. Although I had placed a blanket over my solar panel while doing the install, I had removed it afterwards. Since the batteries were nearly full, and the solar panel was now providing additional charge, this caused the ACRs to open up and essentially parallel the batteries. I followed his advice and waited until dark to make sure the solar panel was no longer putting in current, then turned on all of the lights and used some electricity to draw down the power a bit, enough to cause the ACRs to close. At that point I was able to verify that the starter and house voltages gave unique values and starter battery load no longer affected the house current draw.
 @briandunnington
A quick microadventure on the Olympic penninsula's Lower Big Quilcene River trail

Keeping the microadventures going with a short overnight at Lizard Lake

Some winter fatbiking and camping to kick off a new year of microadventures

We had a big windstorm blow a tree down but made the best of it
Upgrading our solar setup for energy independence